Objective
This guide will walkthrough how to setup a custom PPC report in Marin Software to send to the seoClarity team so that you are able to view the paid data in the platform along with all of your other SEO data.
Requirements
In order to complete the Marin integration you will need to have a Marin Software login.
Setup A New Report
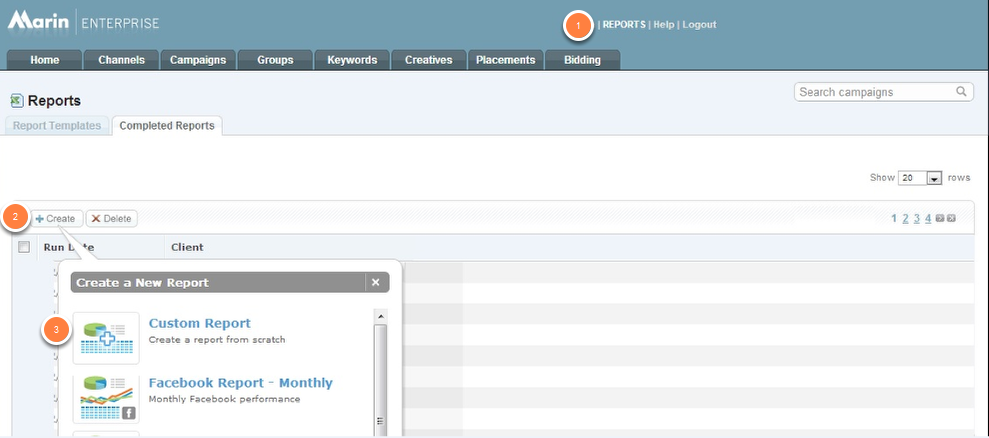
1. Click on the Reports link in the top right corner of the page
2. On this page, click on Create button
3. In the pop-up that appears, click on Custom Report
Edit the Report Settings
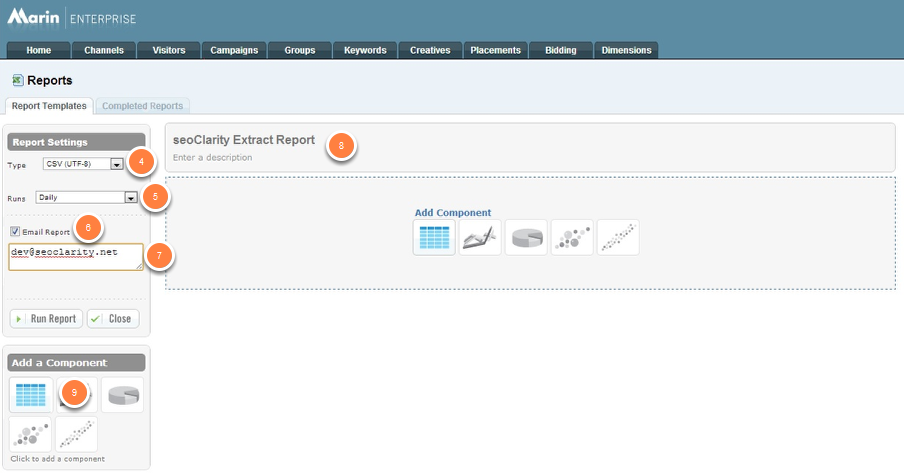
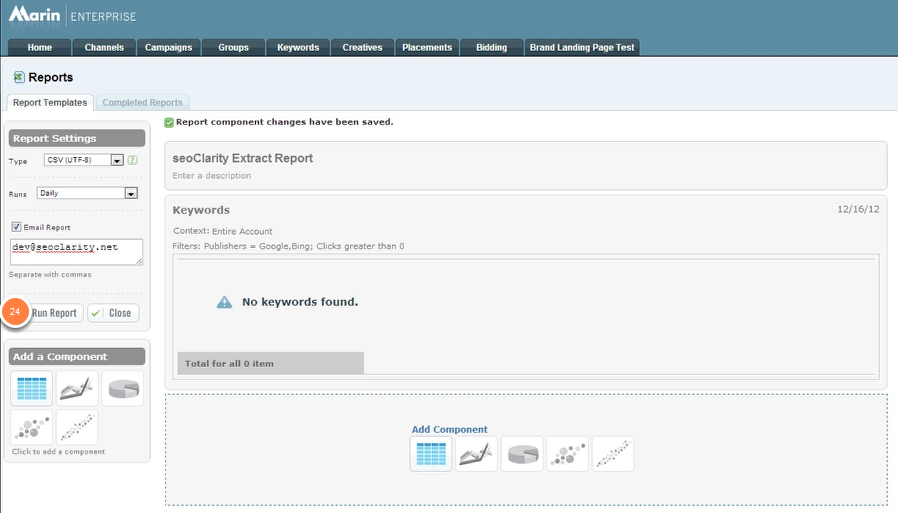
4. In the Type drop down, choose CSV (UTF - 8)
5. Then use the Runs drop down to change it to Daily
6. Click on the Email Report check box
7. Enter the provided email address: dev+domain@seoclarity.net
Domain should be replaced with the name of the domain being integrated
8. In the text box, type in a name for the report that includes seoClarity and the domain being integrated.
9. To move to the next step, click on the table icon under the Add a Component section
Component Settings
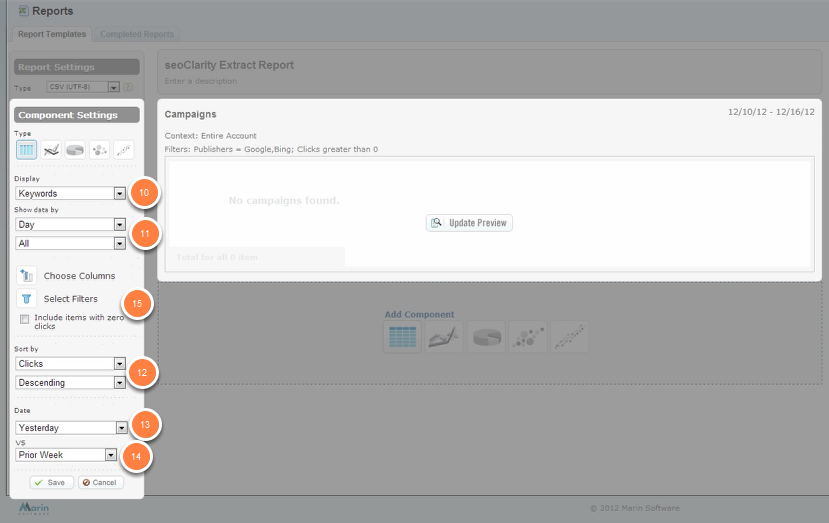
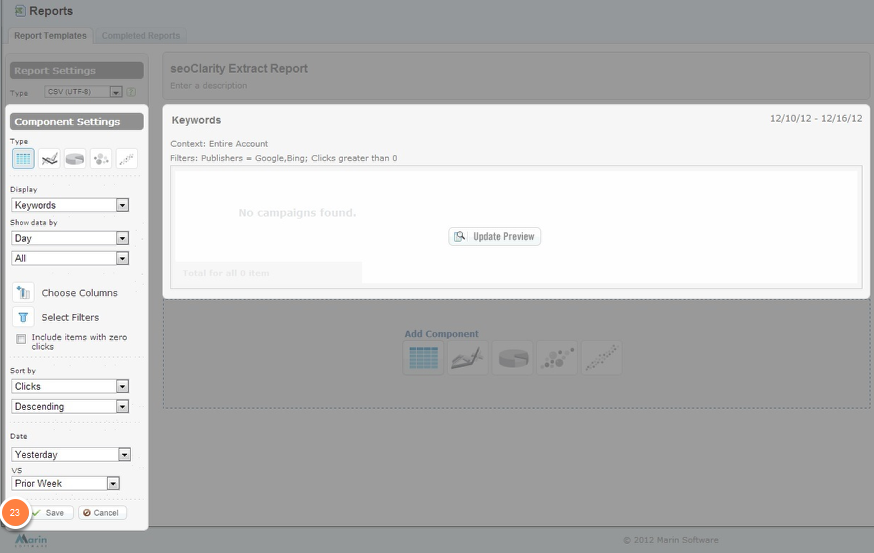
10. In the Display dropdown menu, choose Keywords
11. Then choose Day and All in the Show data by dropdown menus
12. In the next step of dropdown menus, Sort by, choose Clicks and Descending
13. The Date dropdown should be Yesterday
14. And VS should be Prior Week
15. Click on the Select Filters button to move forward in the process
Report Columns
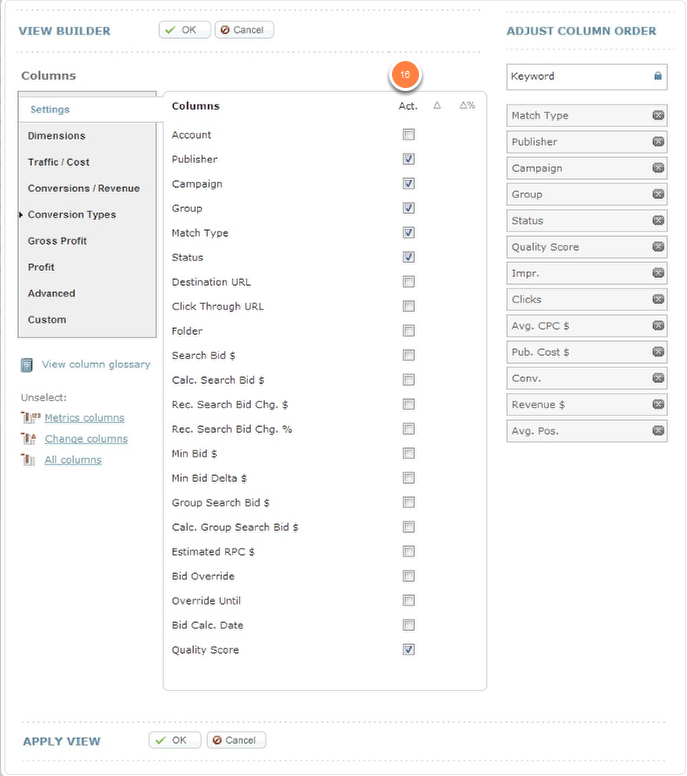
16. In the Settings section, you can select:
- Keyword (pre-selected)
- Publisher (optional)
- Group (optional)
- Status
- Quality Score (optional)
- Search Term
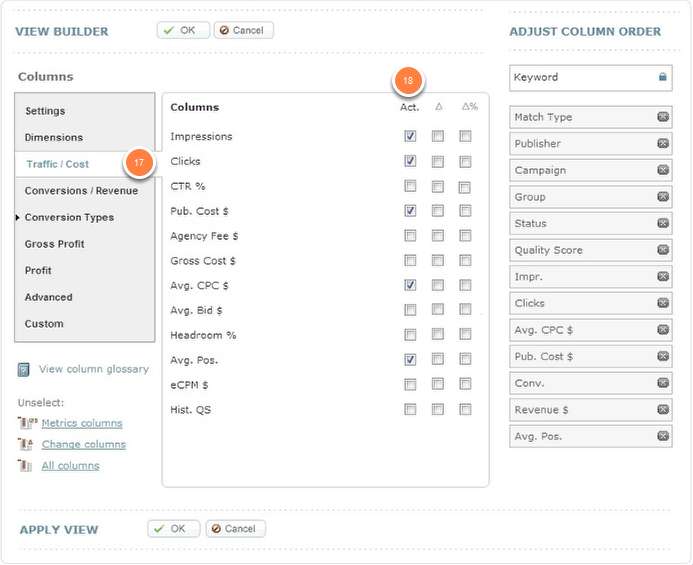
17. Select the Traffic/Cost tab
18. Select these options in the Act. column:
- Impressions
- Clicks
- Pub. Cost $
- Avg. CPC $
- Avg. Pos.
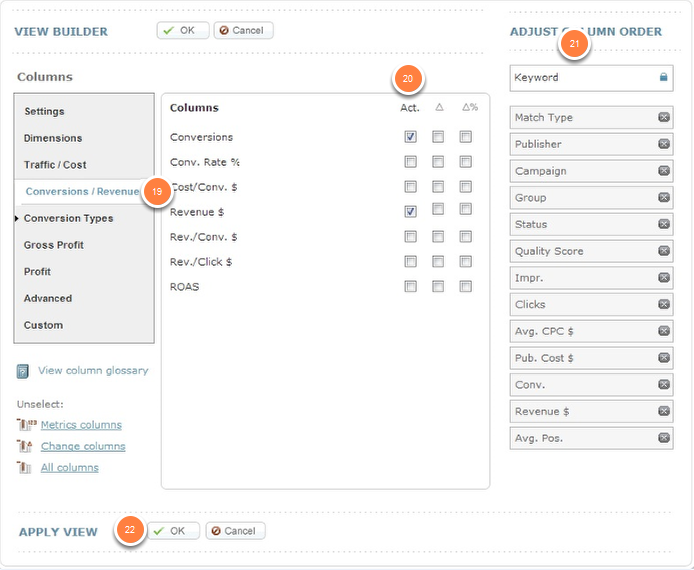
19. Select the Coversions/Revenue tab
20. Select the following options in the Act. column:
- Conversions
- Revenue $
21. After selecting the columns you can rearrange the order of the columns to match the following:
- Keyword
- Search Term
- Publisher (optional)
- Group (optional)
- Status (optional)
- Quality Score (optional)
- Impr.
- Clicks
- Avg. CPC $
- Pub. Cost $
- Conv.
- Revenue $
- Avg. Pos.
22. Click the OK button to save the changes
Save the Component Settings
23. Click the Save button in the menu on the left hand side
Run the Report
24. Back on the Report Templates page, click on the Run Report button to complete the custom report setup
Verify File Delivery for Integration
Once the report is setup, contact support@seoclarity.net to verify the files are being delivered. Once confirmed our technical support team will integrate the reports into seoClarity, and data will be available within 48 Hours.
Summary
Setting up a custom Marin report to integrate with your seoClarity account is great idea so that you are able to view your PPC data alongside all the SEO data that is already in your seoClarity account.